
To use Windows 10, a Blue Screen of Death (BSoD) is also known as “blue screen,” stop error” and “system crash” is a common occurrence. It happens when a problem is discover to be serious and the system isn’t in a position to address and fix the problem immediately.
Most of the time, you’ll face the blue screen issue in the process of upgrading Windows 10. When it’s at the point of starting or using your desktop or laptop. The most troubling aspect is that you’ll get the blue background, which has an uninteresting design it’s not enough data to identify the root of the issue.
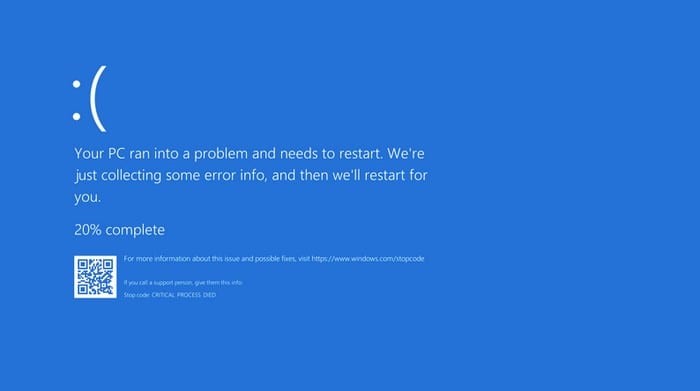
The screen will show an alert that says, for example, “Your PC has encountered an issue and needs restart. We’re just gathering the information about the error to restart the computer on your behalf.” Or general stop error codes (such as VIDEO_TDR_TIMEOUT_DETECTED, PAGE_FAULT_IN_NONPAGE_AREA, CRITICAL_PROCESS_DIED, SYSTEM_SERVICE_EXCEPTION, DPC_WATCHDOG_VIOLATION, or IRQL_NOT_LESS_OR_EQUAL). or hexadecimal codes (such like 000000D1, the 0x0000000A, or the 0000007B). They’re symbols use by the majority of users.
Related Info: How to fix Waasmedic Agent
stop errors can’t give an answer that is definitive since a variety of causes could be at play. The majority of the time it’s because of an update or feature that is compatible with Windows 10, a recently installed driver, an application that isn’t compatible with the hardware, or an issue that is related to the issue.
Within the scope of the Windows 10 guide, we’ll guide you through the many ways to get rid of this error that appears to be blue on your PC.
Windows 10
What can you do to solve the blue screen issue after the upgrade of Windows 10?
If you update to the most current version of Windows 10. You may encounter blue screen issues that could cause by a variety of causes. It could be due to an issue with compatibility between previous versions of security or software. It could cause by damage or damaging data that are in the most recent version, or even an installation disc that is damaging, for instance.
Typically in the event of an error and the software is unable to fix it. The program will adjust the change to the original version, with no explanation.
When you’re having problems installing Windows 10, uninstalling non-essential applications, fixing corrupted or damaged downloads. And removing unnecessary peripherals or new installing the operating system can solve the problem.
Uninstall An Incompatible Application
To get rid of the application that could be in conflict in conjunction with Windows 10, follow these steps:
The Open the Settings.
Click on the Apps.
Click on Features and Apps.
Choose the program that could cause problems, and then select the remove icon.
Click to select the remove button again.
A quick warning: If you’re trying to remove an old desktop application. You might need to follow the directions that are displaying in your display.
After you’ve completed these steps, you might need to go through the process again to eliminate any additional programs. After that, you’ll be allowed to try the upgrade once more. The upgrade is completed, you’ll be able to launch the program again.
Download Installation File
Sometimes in the event that Windows Update is using Windows Update to update your system. You might encounter a Blue Screen of Death when one or more installation files are damaging during the process of downloading. In this situation, you can utilize Settings within Settings in the Settings application to delete the files you previously downloaded. And allow Windows Update to redownload the files.
To permit Windows Update to redownload the upgrade files, follow these steps:
Settings. Open the Settings.
Hit the System.
Select the Storage.
Inside the Local Disk section, click on the item of the temporary file.
- Source: Windows Central
- Remove the options you’ve picked.
- Make sure to select your option to install Temporary Windows Install files. option.
- Source: Windows Central
- Click to the Remove Files option.
Once you’ve completed the process, go towards Windows Update. Once you’ve completed the process, visit Windows Update settings and try to upgrade once more.
If you’re having the same issue, it is recommending to test using this Update Assistant application to perform an upgrade on-site. If the tool did not work is possible to test using the Media Creator tool to make an installation media to install the most recent version.
Read More: Latest Games That You Can Get Free Of Cost